Wednesday, December 23, 2020

It's Water-Wise Wednesday with Frannie the Fish! {Upcycled Olaf Ornament with Bottle Caps}

 Why Upcycling?

Want to learn why Frannie is doing an upcycling project this week? Check out the Upcycled Clothing Pin Snowflake Ornament blog here.

This Week's Project:
Bottle Cap Olaf Ornament

Frannie found some old bottle caps sitting in her desk, and she decided to upcycle them into her favorite Frozen snowman: Olaf!


Materials:
  • 3 bottle caps
  • scissors
  • white paint
  • white, black, and orange construction paper or foam sheets
  • hot glue gun
  • string or ribbon
  • 2 small sticks (can be collected for free outside!)
  • 2 small, white pom-poms

Instructions:

  1. Collect 3 bottle caps. 
  2. Paint the bottle caps white. This may take several layers of paint. Allow them to dry completely before moving on to the next step.
     
  3. Glue the three bottle caps together using a hot glue gun. It might be helpful to ask an adult for assistance when using the hot glue gun. For extra support, glue a piece of string across the back of all three bottle caps. 
  4. Add the stick arms, buttons, and pom-pom feet using the glue gun. If you don't have black buttons, you can use black construction paper.
  5. Using the scissors, cut out the elements of Olaf's face: mouth (with large front teeth), carrot nose, eyes, and eyebrows. Glue these elements to the top bottle cap.
  6. Finish your Olaf ornament by gluing a looped piece of string to the back of the top bottle cap. Congratulations! You have just made an Upcycled Bottle Cap Olaf Ornament! 
For More Fun:

Make a snowman family! Using different items you find around the house (buttons, scraps of yarn or fabric, craft supplies such as glitter, etc.) make some friends for Olaf. Get creative and have fun!

Share: 

Share pictures of your family and your snowmen with us on FacebookTwitterInstagram, or by sending them in to info@groundwater.org. Happy Holidays!

Wednesday, December 9, 2020

It's Water-Wise Wednesdays with Frannie the Fish! {Upcycled Clothes Pin Snowflake Ornament}

Tis the season for repurposed or upcycled decorations! Frannie loves upcycling because it takes something that would normally be thrown away and makes it new and usable again. Upcycling is a great way to reduce our waste and conserve water! 

How does upcycling reduce waste and conserve water? 

Upcycling reduces the need to use new, raw materials when making a new product. By using old materials instead of new materials, less energy and water is used. Even better, air pollution and water pollution are reduced!

Upcycled Clothing Pin Snowflake Ornament:


Frannie was looking through her home for fun items to upcycle when she came across some broken clothing pins. With some creativity (and the help of Pinterest), Frannie decided to make a snowflake ornament out of her broken clothing pins!

What You Need:

  • 8 clothing pins (or 16 halves of clothing pins)
  • white paint
  • paint brush
  • glue
  • string
Instructions:
  1. Gather together your 8 clothing pins. You'll need both halves of each clothing pin for a total of 16 pieces. 
  2. Paint each clothing pin white. 
  3. Glue the clothing pin halves together as shown in the photo. You should end up with 8 snowflake pieces. Thread a string through the hole in one piece. 
  4. Glue four snowflake pieces together into a "+" shape as shown in the photo. 
  5. Glue the final four snowflake pieces into the corners of the already glued pieces, making sure the snowflake piece with the string is located where you would like the "top" of your snowflake to be. 
  6. Congratulations! You have just made an Upcycled Clothing Pin Snowflake Ornament! Hang it up as a winter decoration or wrap it up to give as a gift.
For More Fun:

Get creative! Add color to your snowflake or a touch of glitter. Write a special message on it or have all your family sign their names on it. Have fun!

Share:

Share pictures of your family and your snowflakes with us on Facebook, Twitter, Instagram, or by sending them in to info@groundwater.org. Happy Holidays!

Wednesday, November 11, 2020

It's Water-Wise Wednesday with Frannie the Fish! {Games and Puzzles and Coloring Sheets, Oh My!}

To give her eyes a break from virtual learning, Frannie has enjoyed diving into the dozens of crosswords, word searches, and coloring sheets from The Groundwater Foundation. Frannie knows that learning is more fun when you can be creative and she can't think of a better way to learn about groundwater. Check out some of her favorite activities below!


 Contamination Crossword - How many contamination vocabulary terms do you know?

Find all the groundwater words in this fun word search! Groundwater Word Search


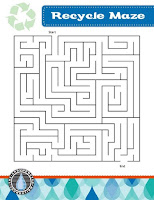
Recycle Maze - Can you find your way out of this twisty maze?


Water Crossword - Review what you know about our most important resource - Water!


Show off your water cycle knowledge and complete the Water Cycle Crossword.


Wet Word Search - How many vocabulary words can you find?


Protect the Earth Coloring Sheet - Reveal your inner artist!


The Groundwater Foundation is regularly creating and releasing fun new content, so keep an eye out for updates from Frannie!

Wednesday, October 28, 2020

It's Water-Wise Wednesdays with Frannie the Fish! {Upcycled Halloween Spider}

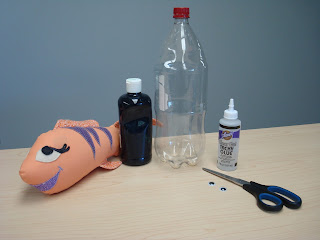
Halloween is THIS WEEKEND! Frannie will be practicing social distancing, staying home instead of trick-or-treating with her friends, but she's still full of Halloween spirit! Frannie found a fun activity you can do, too - making a spooky, upcycled spider!


Here's what you need:
  • 2-liter plastic bottle
  • Black acrylic paint
  • Scissors
  • Glue
  • Googly eyes

What to do:
1. Clean out a 2-liter plastic bottle and remove labeling.


2. Pour black paint in the bottle, screw cap on, and shake the bottle until black paint has coated the entire bottle. This may be messy, so make sure the cap is on tight! When you're done, pour the excess paint out.


3. Let the paint dry overnight.

4. Cut the top of the bottle off and recycle.

5. Make legs for the spider by cutting the bottom of the bottle into 8 strips.


6. Bend the legs outward at the base of each strip.


7. Bend the legs inward about halfway down each strip.


8. Bend the legs inward again at the end of each strip.


9. Glue the googly eyes on your spider.


10. Decorate your house with your spooky spider!


Frannie wishes you a safe and fun Halloween!

Wednesday, October 21, 2020

It's Water-Wise Wednesdays with Frannie the Fish! {5 Ways (You Didn't Know!) You Used Water}

 We all know that water has a very important role in our lives. We use it to drink, to cook our food, to bathe and brush our teeth, and to water our plants or pets.  But water affects our lives in so many other ways we might not think about.  Check out these 5 unique ways that you use water!


1. Heating and Cooling. Many homes and businesses are using something called “geothermal energy” to heat and cool their buildings.  “Geo” means “from the earth” and “thermal” means heat so this type of energy uses the heat from the under the ground to regulate the temperature of a particular system.  Buildings that use this system pump a liquid, often groundwater, through a series of pipes and devices like “heat exchangers” to use the natural heat from the earth to warm up the air inside. During hot summers, a geothermal system can also cool down the air by working in reverse, absorbing the heat from inside and moving it back down into the earth.  This very efficient system costs less than other modern systems and almost none of the energy is wasted.

2. Electricity. 
Hydroelectric power is a clean, renewable, and reliable form of energy that converts the energy of falling water into electricity.  Do you know about the Hoover Dam near Las Vegas, Nevada? It’s one of the nation’s largest hydropower facilities, with each wing of the plant rising nearly 20 stories for a length of 650 feet (almost 2 football fields). With 17 main turbines, the average annual generation is about 4.2 billion kilowatt-hours. That’s over 3.1 billion horsepower and enough energy to serve 1.3 million people, all by using the water!

3. Wearing Clothes. Did you know that 2.6% of the water used globally is for cotton consumption?  That cotton t-shirt that you’re wearing required a lot of water to go from growing in a field to being hung in your closet. And that’s not even taking into consideration the amount of water it takes to dye your shirt, or any other articles of your clothing, into the fun colors you like to wear.

4. Reading, writing, and printing. Did you know that in the US, we use about 69 million tons of paper and paperboard (like boxes and folders) each year? In the process of just making the paper, water is used to grow the trees, maintain the tools that are used to cut the trees, turn the trees into a pulp, and maintain the machines that turn the pulp into paper?  And that’s just to make blank paper. Water is also used to make the ink to print 2 billion books yearly or put fun cover photos on 350 million magazines.  It takes roughly 1,160 gallons of water to make a single pound of paper and that’s a lot of paper.

5. Using a computer. If you think using email, the internet, and, in general, going paperless is the perfect solution: think again. The water it takes to make a single laptop is about the same as washing 70 loads of laundry. A desktop? 1,500 gallons!  Every kind of computer and IT product demands vast quantities of “ultra-pure water”, a kind of water that highly distilled from even larger quantities of “regular” water.

So? How many did you know? If you can think of other ways that water secretly helps our lives, share them with us at info@groundwater.org.

Wednesday, September 30, 2020

It's Water-Wise Wednesdays with Frannie the Fish! {TAPS Manual Part 6: Improperly Constructed Hydraulic Fracturing Wells}

 Frannie's friends at the Groundwater Foundation recently published the second edition of the Training About Protecting the Source (TAPS) Manual. The manual guides users through hands-on activities that explore potential threats to groundwater and challenges them to think about what can be done to protect this key drinking water source.

This manual can be used inside the classroom and is aligned to the national Next Generation Science Standards, but Frannie loves just learning about groundwater, no matter where she is. For the next few weeks, you can join her as she works through the different activities. 

Frannie will be using the Groundwater Foundation's Awesome Aquifer Kit, but if you don't have one, you can follow along with materials that might be found around your home. This is the second part of Frannie's exploration of the TAPS Manual. You can follow the link to see what she learned about improperly operated landfillssinkholesleaky underground storage tanksimproperly abandoned wells and the over-application of fertilizer.

Today's activity is....Improperly Constructed Hydraulic Fracturing Wells.
---

Hydraulic fracturing, commonly referred to as “fracking”, breaks up the ground deep beneath the surface in order to allow companies to more easily access oil and gas. The technique uses a mixture, or slurry, of water, chemicals, and sand and pumps it into the ground at a very high pressure. Fracking fluids can contain a variety of toxic chemicals such as diesel fuel, acids, and acetone. Grouting is the process of filling the spaces between the borehole, or the hole drilled during construction, and the well casing with an impermeable material like cement. Proper grouting and proper disposal of the fracking fluids can prevent these chemicals from leaching into the groundwater. 


For this activity, you will need:
  • Awesome Aquifer Kit
    • Plastic box
    • Gravel
    • Plastic tube
    • Hand pump or syringe
    • Nylon
    • Rubber band
  • Plastic bendable straw
    • Prepare the straw by trimming the longer end so that it's approximately 3 inches long. Poke several holes along the longer side with a pushpin to represent where the fracking fluid is expelled to release the natural gas.
  • A small cup (approximately 30 ml) of intensely colored water
  • 16 oz cup of water

Activity Steps 
1. Read through all the instructions first before you begin to build the model. Make sure you have all the needed materials and supplies.
 
2. Fill the plastic box with gravel until it is about ¼ full.
 
3. Add water so that half of the rocks are covered. (This will represent an aquifer.)
 
4. Create a hydraulic fracturing injection well by securely attaching the straw to the plastic tube with a rubber band. Secure the well screen (piece of nylon) to the end of the straw with an additional piece of rubber band. You may have to cut a small slit at the short end of the straw in order to get it to roll in on itself and slide into the tubing.

5. Place your hydraulic fracturing injection well on top of the gravel. Add more gravel until the box is about ½ full.
 
6. Fill the syringe full of the intensely dyed water, which represents fracking fluid. Attach the full syringe to the well. 
 

7. Pump the fluid into your aquifer by pushing on the plunger. Observe what happens to the fracking well and the water around it.
 

Frannie noticed that the toxic fracking fluid was escaping out of the poorly sealed section between the well casing and the injection casing. Proper grouting could have contained the chemicals better, allowing it to be pumped out with the rest of the fluid once the hard rock layer had been sufficiently broken up. If she had properly sealed and grouted her well with cement or bentonite clay, which could be represented by the modeling clay included in the Awesome Aquifer Kit, she could have prevented this dangerous contamination.

Wednesday, September 16, 2020

It's Water-Wise Wednesdays with Frannie the Fish! {World Water Monitoring Day}


Frannie will be back in two weeks with the last installment of the TAPS activities, but she didn't want to miss sharing World Water Monitoring Day with you!

World Water Monitoring Day is celebrated on September 18th and is different that World Water Day (which we celebrate on March 22). The first World Water Monitoring Day was in 2003 when America's Clean Water Foundation created a challenge to empower individuals to monitor their local water bodies. In 2015, the challenge was taken on by EarthEcho International. 

Now, with a simple test kit and an account on the EarthEcho Water Challenge app, you and your friends can join over 1.6 million people in 146 counties world wide in learning about and protecting our water sources.

Joining online or via the mobile app is easy and you can create an account with Google or Facebook. Once you have an account, you can start monitoring your local creeks, rivers, ponds, lakes, and more! The database allows you to add important water quality information, pictures of the site, and information about the citizen scientists (that's you!) who collected the data.


You can collect data all year long, as long as you can access the liquid water in your area. Just remember to follow the water safety rules, which you can find on The Groundwater Foundation's website.

Be safe and Happy World Water Monitoring Day!


Wednesday, September 2, 2020

It's Water-Wise Wednesdays with Frannie the Fish! {TAPS Manual Part 5: Improperly Operated Landfills}

Frannie's friends at the Groundwater Foundation recently published the second edition of the Training About Protecting the Source (TAPS) Manual. The manual guides users through hands-on activities that explore potential threats to groundwater and challenges them to think about what can be done to protect this key drinking water source.


This manual can be used inside the classroom and is aligned to the national Next Generation Science Standards, but Frannie loves just learning about groundwater, no matter where she is. For the next few weeks, you can join her as she works through the different activities. 

Frannie will be using the Groundwater Foundation's Awesome Aquifer Kit, but if you don't have one, you can follow along with materials that might be found around your home. This is the second part of Frannie's exploration of the TAPS Manual. You can follow the link to see what she learned about sinkholesleaky underground storage tanksimproperly abandoned wells and the over-application of fertilizer.

Today's activity is....Improperly Operated Landfills.
---

A municipal solid waste landfill (MSWLF) is an area of land that typically receives household waste and sometimes can receive other types of nonhazardous waste, such as commercial solid waste, nonhazardous sludge, and industrial nonhazardous solid waste. According to the EPA, there are approximately 2,000 MSWLFs in the U.S. that are managed by the states in which they are located. When rain, snow, or runoff water soaks into and through a landfill, it can dissolve some of the landfill’s contents and, in an improperly constructed or operated landfill, carry it on down to the groundwater. This mixture of recharge and particles from the landfill’s contents is called leachate. As the amount of waste increases, the potential for leachate to enter the groundwater increases.

For this activity, you will need:
  • Awesome Aquifer Kit
    • Plastic box
    • Gravel
    • Plastic tube
    • Hand pump or syringe
    • Nylon
    • Rubber band
  • 2 inch square piece of dyed paper towel (prepped in advance)
    • Dip a paper towel in/or spray with slightly diluted food coloring (2 drops of dye per ounce of water)
    • Allow to dry completely.
  • 16 oz cup of water

Activity Steps 
1. Read through all the instructions first before you begin to build the model. Make sure you have all the needed materials and supplies.
 
2. Fill the plastic box with gravel until it is about ¼ full.
 
3. Add water so that half of the rocks are covered. (This will represent an aquifer.)
 
4. Create a well by covering the end of the plastic tube with nylon, securing it with a rubber band.

 5. Insert the well, with the well screen on the bottom, near one corner of the plastic box. Push the well down so that it reaches the bottom of the model.
 
6. Take the colored piece of paper towel, scrunch it up, and bury it on the opposite side of the model from the well location and near the outside of the box. (This is your landfill.)  
 
7. Pour or spray water on the surface of the gravel to simulate rain. Observe what happens to the landfill and groundwater after the rain.

8.  Pump the well by inserting the tip of the syringe into the well (plastic tube) or attaching and pumping the hand pump.


Once it got wet, the stained paper towel began to leach some red into the surrounding groundwater. Frannie also noticed that the water she pumped out of the other end of the model was colored a light pink. Leachate from improperly managed landfills can flow in underground plumes, eventually contaminating nearby wells, but this can be prevented. Landfills that are properly operated have safety measures in place to mitigate the chances that dangerous chemicals will enter into the ground. Proper recycling of hazardous waste, such as pharmaceuticals, paint, oil, cleaners, electronics, batteries, and more can keep contaminants from getting into the system in the first place.

Wednesday, August 19, 2020

It's Water-Wise Wednesdays with Frannie the Fish! {TAPS Manual Part 4: Sinkholes}

Frannie's friends at the Groundwater Foundation recently published the second edition of the Training About Protecting the Source (TAPS) Manual. The manual guides users through hands-on activities that explore potential threats to groundwater and challenges them to think about what can be done to protect this key drinking water source.


This manual can be used inside the classroom and is aligned to the national Next Generation Science Standards, but Frannie loves just learning about groundwater, no matter where she is. For the next few weeks, you can join her as she works through the different activities. 

Frannie will be using the Groundwater Foundation's Awesome Aquifer Kit, but if you don't have one, you can follow along with materials that might be found around your home. This is the second part of Frannie's exploration of the TAPS Manual. You can follow the link to see what she learned about leaky underground storage tanksimproperly abandoned wells and the over-application of fertilizer.

Today's activity is....Sinkholes.
---

A sinkhole is a depression that is formed as underlying limestone or a similarly soft rock is dissolved by groundwater. Typically, sinkholes form slowly so that the top layer of land stays intact for a while after the rock below dissolves. Sinkholes vary greatly in area and depth and can be small and shallow or they may be very large. Sinkholes form a direct path to groundwater through which contaminants can easily enter.


For this activity, you will need:
  • Awesome Aquifer Kit, OR
    • Plastic box
    • Gravel
  • Sugar cubes (at least 12 cubes)
  • 16 oz cup of water slightly above room temperature
  • Small plastic toy or house (optional)
Activity Steps

1. Read through all the instructions first before you begin to build the model. Make sure you have all the needed materials and supplies.
 
2. Fill the plastic box with gravel until it is about ¼ full.
 
3. Add water so that half of the rocks are covered. (This will represent an aquifer.)
 
4. Place sugar cubes on the gravel, next to one side of the plastic box. The sugar cubes should be at least three cubes across, two cubes wide, and two layers deep. The sugar cubes simulate layers of limestone.

 5. Add more gravel on top to cover the sugar cubes completely. You can either create a hill over the sugar cubes or continue to add gravel so that surface of the model is level.
 
6. If you have a small plastic toy animal or house, place it on top of the gravel directly above the sugar cubes.


7. Pour or spray water (preferably warm water) over the buried sugar cubes to simulate rain. Watch and wait.
Frannie noticed that the warm water slowly dissolved the sugar cubes beneath the gravel. The surface of the gravel remained level for a little bit, but eventually it collapsed into the vacuum that was left by the sugar. Like sugar cubes, soluble geologic materials can dissolve over time due to natural causes or human impacts such as over-pumping and over development. Once a sinkhole appears, it can become a direct line for contaminants to enter the water below.

Wednesday, August 5, 2020

It's Water-Wise Wednesdays with Frannie the Fish! {TAPS Manual Part 3: Leaky Underground Storage Tanks}

Frannie's friends at the Groundwater Foundation recently published the second edition of the Training About Protecting the Source (TAPS) Manual. The manual guides users through hands-on activities that explore potential threats to groundwater and challenges them to think about what can be done to protect this key drinking water source.

This manual can be used inside the classroom and is aligned to the national Next Generation Science Standards, but Frannie loves just learning about groundwater, no matter where she is. For the next few weeks, you can join her as she works through the different activities. 

Frannie will be using the Groundwater Foundation's Awesome Aquifer Kit, but if you don't have one, you can follow along with materials that might be found around your home. This is the second part of Frannie's exploration of the TAPS Manual. You can follow the link to see what she learned about improperly abandoned wells and the over-application of fertilizer.

Today's activity is....Leaky Underground Storage Tanks.
---

An underground storage tank system (UST) is a tank and any underground piping connected to the tank that has at least 10 percent of its combined volume underground. Underground storage tanks can contain fuels, chemicals, and wastes. According to the US Environmental Protection Agency there are over 550,000 underground storage tanks that store fuels or other hazardous substances. These tanks may leak and when they do, they can contaminate surrounding soil, groundwater, surface waters, and even affect indoor air quality.


For this activity, you will need:
  • Awesome Aquifer Kit, OR
    • Plastic box
    • Gravel
    • Plastic tube
    • Hand pump or Syringe
    • Nylon
    • Rubber band
    • Food dye
  • Small plastic container with lid (ex. a film cannister, sprinkles or spice container, etc.)
  • 16 oz cup of water
Activity Steps

1. Read through all the instructions first before you begin to build the model. Make sure you have all the needed materials and supplies.
 
2. Fill the plastic box with gravel until it is about ¼ full.
 
3. Add water so that half of the rocks are covered. (This will represent an aquifer.)
 
4. Create a well by covering the end of the plastic tube with nylon, securing it with a rubber band.
 
5. Insert the well, with the well screen on the bottom, near one corner of the plastic box. Push the well down so that it reaches the bottom of the model.
 
6. Add more gravel until the box is about ½-¾ full. The surface of the gravel should be fairly level across the box.
 
7. Dye about 1.5 oz of water with three or four drops of food coloring and use it to fill the plastic container. Seal the container when full.
   
8.Using a tack, carefully poke holes in one end of the film canister or container.
 
9. Dig a small hole in the gravel on the opposite side of the model from the well. Place the canister/container inside the hole. The end of the container with the holes poked in it should be facing down. Cover the container, either partially or entirely, as long as at least 10% of it is underground.
 
10. Pour water on the surface of the gravel to simulate rain. Observe what happens to the colored water inside the storage tank after it rained. 
 
11. Pump the well by inserting the tip of the syringe into the well (plastic tube) or attaching and pumping the hand pump.


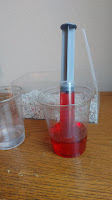
Frannie observed that once the water "rained" over her aquifer, the red water, which was contained in the storage unit, leaked out into the aquifer below. As it rained more and more, even more leachate entered the aquifer. Very quickly, the whole aquifer becomes contaminated  and when Frannie tried to pump water up from the aquifer, it was pink from the contaminant. 

Storage tanks are a common and useful way of storing and disposing of toxic waste, but they must be monitored carefully to prevent contamination of our drinking water sources, crops, and livestock.